In this exercise we will create an Android mobile app that displays your current coordinates in the app and shows your position on a map.
What are co-ordinates?
On a map co-ordinates are measured by latitude and longitude and a number for both these measurements can pinpoint your exact position on earth.

What is GPS?
Your location on earth can be provided from GPS satellites orbiting around the earth. Mobile phones make use of these GPS satellites to determine your co-ordinates on earth.
Android Location Services
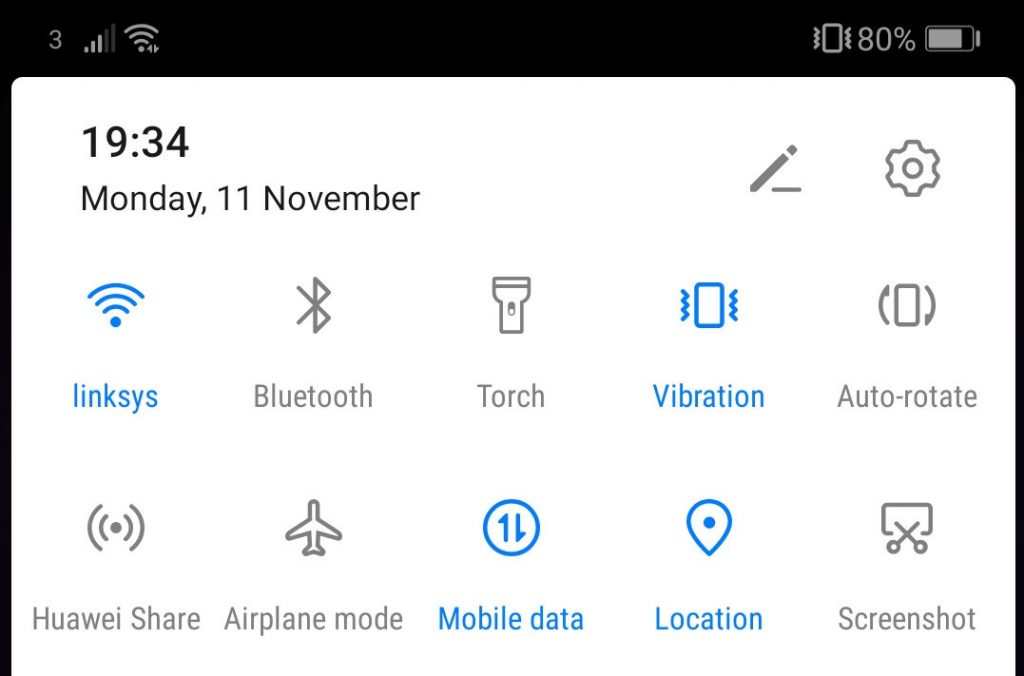
While we are creating our app (and anytime we want to use it) we need to enable ‘Location’ services on the android device. This is shown in the image below and enables us to get information from GPS satellites:
Create a New AppInventor App
Log in to AppInventor here and make sure you have a Google account so you can login and save your projects.
In the top menu choose ‘Projects‘ > ‘Start New project‘. Type ‘LocateMe’ as the project name and click OK.
With the ‘Screen 1’ component selected, scroll down the properties panel until you find the ‘Title’ field. Change the text to ‘Locate Me’ and notice that this change is reflected in the Viewer in the centre of the page.
App Design
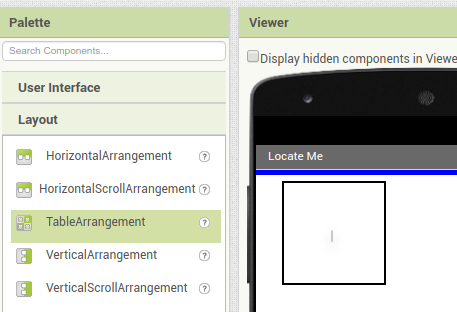
We need to place some ‘components’ on the screen so that we have something to look at. Look down the ‘Palette’ panel and drag a ‘Table Arrangement‘ onto your screen design.
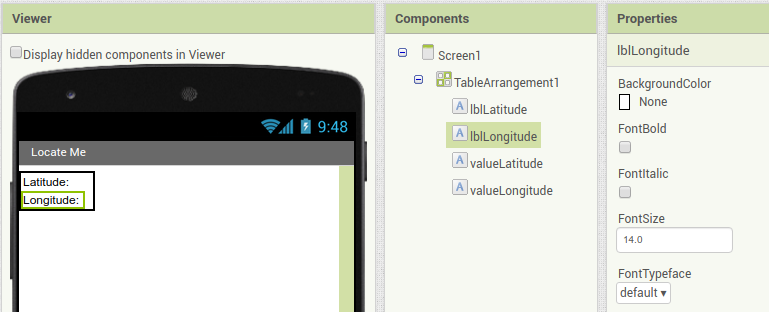
Next add some labels to the inside of the ‘table arrangement’ so that there is a label in each of the 4 cells of the table.

For each of the 4 labels
- Change the ‘Text‘ in the properties panel
- Rename the label in the ‘Components’ panel
If you get stuck just ask for some help from a mentor. You should end up with something like this:
The Map
The next step is to add a ‘Horizontal Arrangement‘ onto your screen under the labels you have already added. You will find ‘Horizontal Arrangement’ in the ‘Layout’ section of the Palette.
Set the properties of that component so that ‘Height‘ is 50% and ‘Width‘ is set to ‘Fill parent‘.
Drag a ‘Map‘ from the ‘Maps’ section of the Palette inside the Horizontal Arrangement.
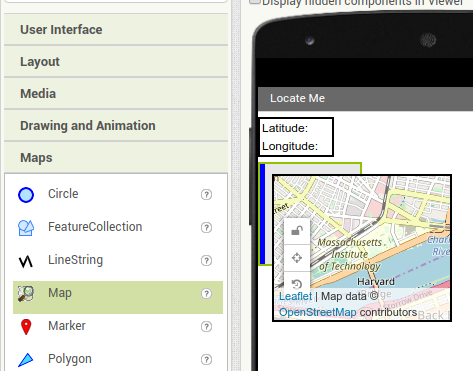
Set the properties of the Map as follows:
- Height: Fill Parent
- Width: Fill Parent
- Zoom Level: 13
Next click and drag a ‘Marker‘ from the Palette maps onto the map in your design.
Location Sensor
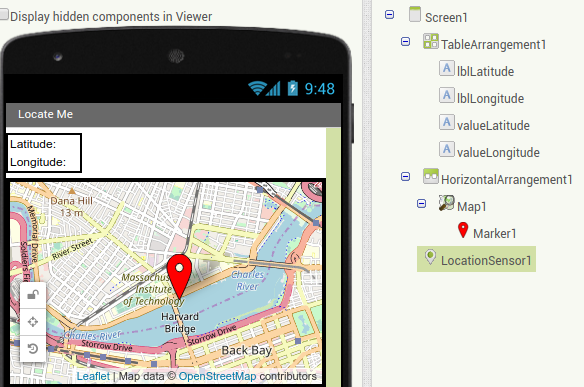
Next we need to add a sensor so that we can get the latitude and longitude from the phone’s GPS sensor. Drag a ‘LocationSensor‘ from the ‘Sensors‘ section of the ‘Palette’ onto your screen design. Since this is not something the user will actually see on the screen it is added underneath the design as a ‘Non-visible component’.
Your design should now look similar to this screenshot below:
Test Your App
Now that you have the initial design let’s check what it looks like
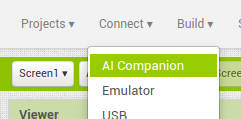
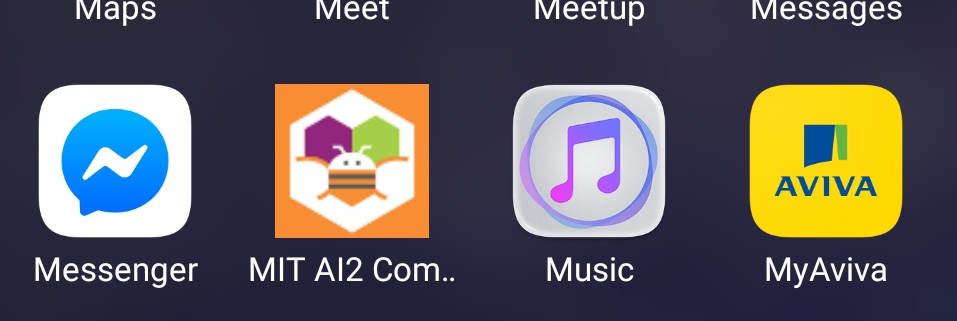
On your Android phone or tablet make sure you have the ‘MIT AI2 Companion’ installed. Run it and then enter the code that you were given on the AppInventor website and touch the ‘Connect with code’ button:
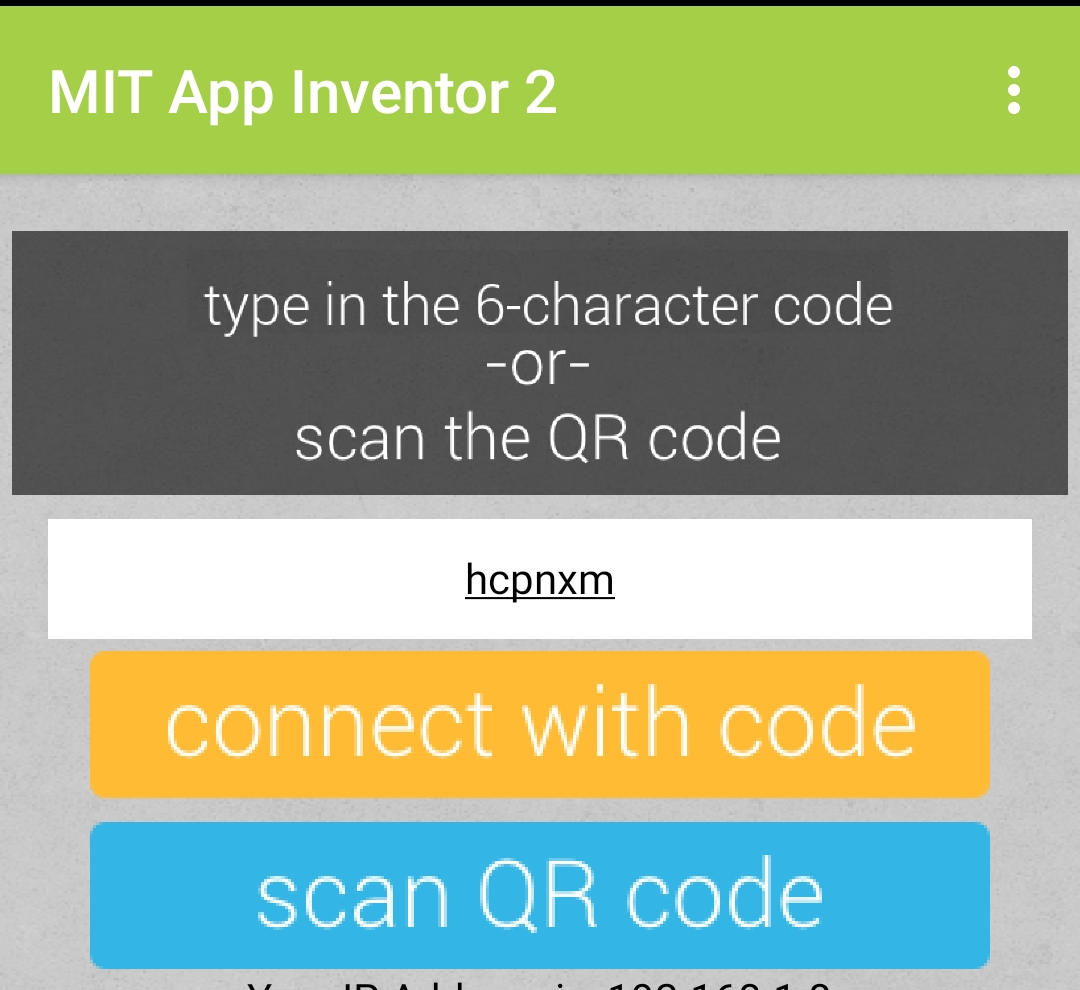
As you change your app the AI Companion will also change so you can follow your changes. If you run into problems you may need to reset the connection and start MIT AI Companion again.
Code Time
Now it is time to code your app. At the top right of the screen you should see that you are in ‘Designer’ mode. Click on the ‘Blocks’ button so you can add some code blocks to your app.
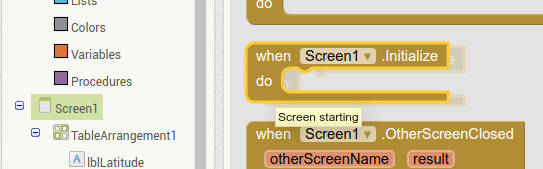
Locate your ‘Screen1’ component in the ‘Blocks’. Click it and find the block for ‘when Screen1 Initialize’. Drag that block onto the ‘Viewer’.
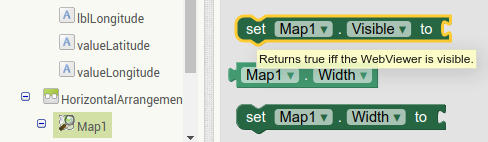
We want to hide the map until we know the person’s location so click the ‘Map’ and find the block for ‘set Map1 visible to’.
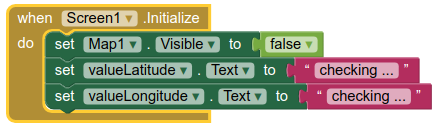
Then drag a ‘false’ block from the ‘Logic’ section and join it to your ‘Map Visibility’ component.
Next find the ‘set’ blocks for each of your value labels so that the text shown to the user at the start says ‘checking…’. See if you can do it so that it looks like the example below:
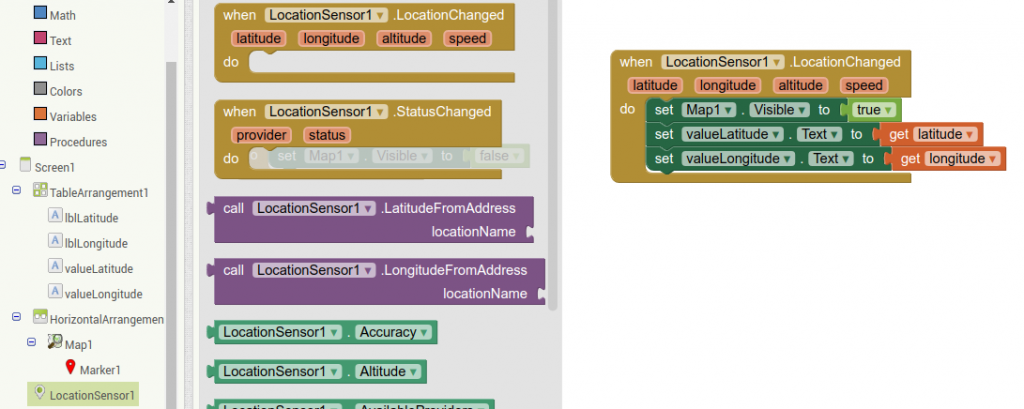
Next we need to take some action when the phone GPS sensor finds the location so click on the ‘LocationSensor1’ in the component list on the left. In the pop-out menu drag the ‘when.LocaitonSensor1.LocationChanged’ block onto the Viewer.
Then inside that block you will need to add blocks for:
- Set Map1 to visible
- Set the latitude label value to the discovered latitude
- Set the longitude label value to the discovered longitude
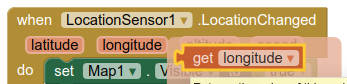
Hint: you can get the blocks you need by hovering over the ‘latitude’ and ‘longitude’ buttons on the ‘LocationChanged’ block:
See if you can try that yourself to match the screenshot below:
Test your App
Now would be a good time to test your app and see if there are any bugs!
The Marker
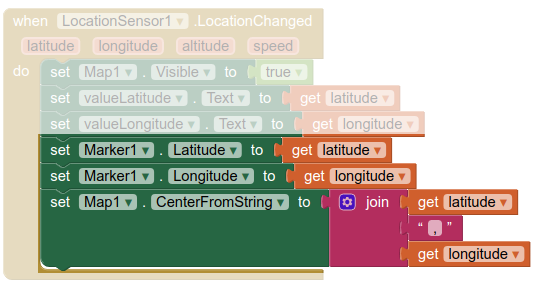
We would like to have the marker placed on the location of the user of the app so inside the ‘LocationChanged’ block add blocks for:
- Set Marker1’s latitude to the ‘get latitude’ value
- Set Marker2’s longitude to the ‘get longitude’ value
- Center the Map on the user’s location with set Map1, CenterFromString. The CentreFromString block expects coordinates in the format -6.123,52.345 so you will need to use a ‘Join’ block to build that string with a comma in between.
- You can find the ‘Join’ block under the ‘Text’ blocks. You will need to add an extra string to the join block (as shown below) so that you can have three elements for your string e.g. -6.123,52.345

You should end up with something like this:
Test your app again to make sure it works!
Share With Friends
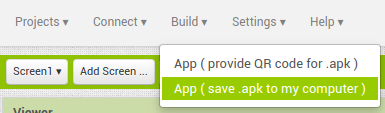
You can now share your app with friends. To do so you will need to download the ‘APK’ package for your app. In the menu at the top of your screen click the ‘Build’ menu then ‘App (save .apk to my computer)’. When the apk file is downloaded you can send it to your friends and family and they will be able to run your app.
Can you make it better?
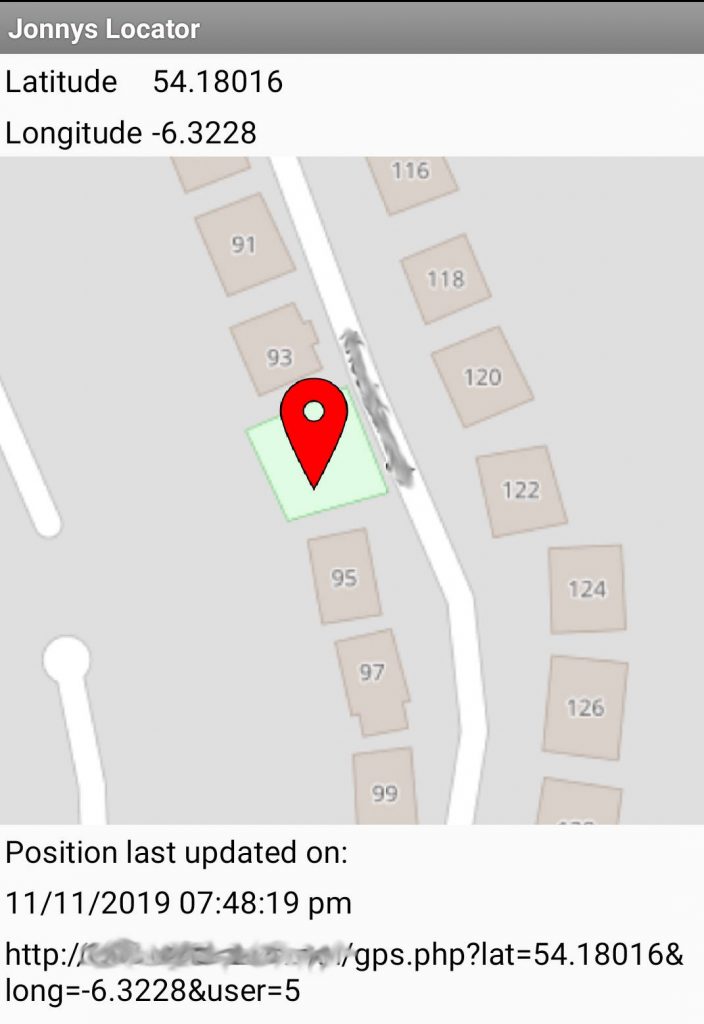
When I was building this app I sent the coordinates to a server so that the position could be stored in a database and the location could be displayed to other people.
You could continue to make your app better at home too. Maybe you could adapt it to turn it into a vehicle location service for a taxi or bus company. Or create an app for parents to know the location of their kids. If you need help come along to a dojo session to get some guidance.
Maybe you could show off your new app at the ‘Coolest Projects‘ show in Dublin.